

Hey Everyone!
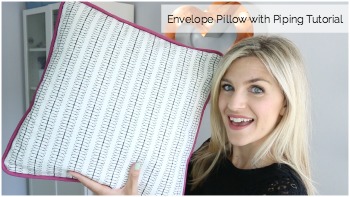
I have a new tutorial up, woohoo! I have been wanting to do a pillow tutorial featuring piping for a long time! This video shows you how to cut bias strips to make piping for this pillow. It is also an envelope enclosure, which is just a must in my house with smaller kids and it is still really simple! I hope this inspires you to make some fun pillows!
Materials
Main fabric (mine is from Joann fabrics in the upholstery section –
binding fabric – Kona Cotton 1/2 yard
6/32 cotton cording or something similar
pins
rotary blade and mat
sewing machine and coordinating thread
iron/ironing board
Measurements
16 inch pillow form
(1) 17 x 17 inch for front panel
(2) 17 x 12 for back panels
73 inches of bias binding – Add all four sides and add 5 inches.
14 inch pillow form
(1) 15 x 15 inch front panel
(2) 15 x 11
65 inches of bias binding – Add all four sizes and add 5 inches
20 inch Pillow form
(1) 21 x 21 inch fron panel
(2) 21 x 14 for back panels
89 inches of bias binding
I serged my seam on the inside of my pillow to keep it from fraying. You may also zig zag. Also, no need to clip your corners on this project 😉
Written Instructions:
Prewash and iron fabric
Cut out fabric pieces to specified size
Take the back 2 pieces to the ironing board and iron the longer (horizontal) edge over 1/4 and again 1/4 inch to prepare for sewing. (:52)
Sew down both seams that you just pressed with a coordinating thread about 1/8 away from the edge.(1:00)
Take our fabric for your binding and make straight edges. Mine was 1/2 yard. (1:09)
Take the selvedge edge of the fabric and fold it diagonally so that it lines up with the straight edge of our fabric (1:25)
-the diagonal fold is the bias. It gives the binding more give and stretch to get around the corners.
Fold the bias edge on top of itself 2 times keeping the folded edge lined up (1:45)
Turn fabric so that your folded bias edge is on the right had side and trim the fold to create a straight edge (2:12)
Flip that cut edge to the left side of the mat and using the ruler, make 3 cuts or however many you need to get appropriate bias binding size (2:20)
Trim all bias strips so that it is a straight rather than diagonal edge (3:00)
Join all bias binding strips with a bias join (3:14)
Fold the end of the bias strip about 3/4 inch and place your cording inside (4:01)
Fold the strip with the cording inside, matching up the raw edges and pin in place (4:08)
Using a zipper foot or cording foot, sew a stitch as close to the cording as possible using a thread that blends with your fabric, back stitch on both ends (4:12)
Attach the binding to the front square of the pillow pieces with pins very well.. (4:53)
Match up the raw edges and put small cuts in the cording tape to go around the corners. (4:57)
Trim end of the piping and place inside the fold from the beginning of the piping to conceal the end. (5:35)
Using the zipper foot, sew the pinned piping to the front panel of the pillow back stitching at beginning and end.. Go slow around the corners.(5:53)
Place front panel right side facing up and take the first back panel and lay the right side down (right sides together). The finished seam should be in the center of the pillow, raw edges should be matched up on the outside. Place 2nd back panel on top of the first, right side down with the seam toward the center and the raw edges matching on the outside edge. (6:56)
Pin in place (7:10)
Sewing all the pieces together with the zipper foot. Seam allowance should be between 1/2 and 5/8 inch. Remove pins as you go, and go slow around the corners. Back stitch at front and back as well as the openings. (7:21)
OPTIONAL
To make your pillow more washer friendly, serge or zig zag stitch your inside seam. No need to clip the corners.
You are done!
Here is the video! Let me know what you think!
Kellie Russell
Wednesday 23rd of November 2016
I love that you provide dimensions for different sized pillows. Is there a formula that you use to figure the piping cord or back panels? I have large floor pillows that I'm planning on recovering and would love to add the piping. The pillow dimensions are 35x26. Could you help me with fabric dimensions or a formula to use? Thank you so much.
Shannon
Monday 12th of September 2016
Melanie, Thank you so much for your videos! I just got my first sewing machine this weekend and made the envelope pillow!! I'm so excited to learn more! Thanks again!! Shannon
Titch
Sunday 24th of April 2016
Thanks Melanie, well explained tutorial for my 1st piping attempt! I discovered your on YouTube last year, great find. Titch (Australia)
Melanie
Tuesday 3rd of May 2016
Thanks for stopping by!
Simona shay
Sunday 5th of July 2015
Thank you , I love it!
Lou
Friday 3rd of July 2015
Melanie: I really love your how-to videos. You are an excellent teacher. Your enthusiasm rubs off and gets me excited and confident to try your projects. Please keep making these videos. I would also like to learn how to do a roll-shaped pillow (with piping on ends). Thank you again for what you do - your passion for your work shines through.